photo bg3strip_zps84a0a992.jpg

Wednesday 28 November 2012

How to style Maxi Skirts for Winter.

Ah, maxi skirts. Floaty fabric in pastel colours, keeping you nice and cool in the hot sun, blowing around in the Summer breeze, worn with a simple tank top, sunglasses and flip flops. Right? Wrong. It's Winter now, snap out of your daydream people! Maxis have been given an update, with heavy, dark coloured fabrics and now you can wear them with your cosy tights and jumpers, score.

As a general rule of thumb, I wear anything with my maxi (a black jersey Topshop number with a split up each side, which doesn't appear to be on the website any more). Trying new things keeps it looking interesting, and as it's just a simple black skirt it'd be totally pointless to limit yourself, chances are it'll go with the majority of winter stuff you have in your wardrobe.

For the day, try teaming your skirt with a tucked in t shirt, or a loose drapey vest hanging out. Chunky knit cardigans or loose jumpers will keep you warm and cosy, or try a leather jacket to toughen it up. Fine knit jumpers belted at the waist look great. Shoe-wise, chunky Lita-style heels look great, or try some flatforms (they're growing on me). I tend to just wear my regular ankle boots with a little chunky heel, or ballet flats. When it comes to jewellery, go for studs and crosses which are EVERYWHERE at the minute but I love them regardless.

For nighttime, try a more fitted skirt, maybe with a raunchy little slit up the side (though I wear this during the day. What that says about me I don't know). Mix up your textures - try a sheer blouse with an embellished collar tucked in, or a leather (read: faux leather) peplum top. If you have killer abs - and you're not shy - you could even go for a sequin bralet, I wish I could pull that off. Keep your heels high and your jewellery gothic, and carry an oversize clutch to fit your studded flats in for when your feet hurt too much. Is it only me that does that?

Here are some ideas for you visual folks.

Daytime

Wear with casual tops and chunky knits to keep you warm, patterned scarves will add some interest to the look. Chunky shoes and on trend jewellery finish off the look.
Night time

As a general rule, go for different fabrics and sparkly embellishments.  Wear a fitted blazer to keep warm, and try a dressy top and high heels with your skirt. Dress it up even more with jewellery.

And, because I'm good to you, I've picked out a few of my favourites from Lookbook to inspire you even more. As usual, click to enlarge.


Sunday 18 November 2012

Ultimate Chocolate Cake.

Sorry I've been MIA for like, the last week. I had a ridiculous amount of work to do for uni: I had to write up company profiles for 12 lingerie brands and compare them and stuff. That doesn't sound like too much, I know.

I ended up with 55 pages and 15000 words. I'm only a second year, I did so not sign up for this! Kidding, it was alright - I'd rather be looking at pictures of pretty, ludicrously expensive bras and suspender belts than writing up a report on critical path or something equally THRILLING. I also got to play on Photoshop and make pretty cover pages (the boyfriend was clearly loving our living room floor at this point).


ANYWAY, on to the real point of this post. I present you with my recipe for the Ultimate Chocolate Cake (capitalisation 100% necessary). It is my own recipe, honed to perfection, so if you change any of it I'm going to have to come round and beat you. It's the perfect mix of rich, chocolatey, gooey, cakey-ness and you need to go and make it pretty much now. I don't have any photos of the method because when I'm making it I'm far too excited for it to be done so I can stuff it in my face, so there is no time for artful photography. It's also ridiculously simple so if you can't follow these instructions without photographic help you should probably stick to boxes of cake mix, sorry.

I should also probably mention that you are unlikely to ever eat anything else with this much sugar in it. I won't tell you how many calories are in one slice ...


Ultimate Chocolate Cake

Ingredients
  • 220g self-raising flour
  • 350g caster sugar
  • 90g cocoa
  • 1 tsp baking powder
  • 1 tsp salt
  • 2 large free range eggs
  • 200ml buttermilk
  • 110g butter, melted
  • 1 tbsp vanilla extract
  • 100ml medium strength coffee

Method
  1. Preheat oven to 170c (I think I have a fan oven. If you don't, best do it at about 190c). Grease and line two cake tins and set aside. The lining might seem like an unnecessary extra step but all you need to do is cut out two circles and stick them in the pan, and it'll make your life so much easier when they come out the oven. I use these 8 inch pans - I have 4. I love them. I like 8 inch pans because I prefer a slightly taller cake with a smaller diameter. 
  2. Okay, onto the baking. Stir together flour, sugar, cocoa, baking powder, and salt. Don't be tempted to add more baking powder to make the cake rise more - it doesn't need it with the self raising flour, it's a big-ass cake anyway. And it could actually have the opposite effect and make it sink. It also might seem like there's a lot of salt but it cuts through some of the sweetness and brings out the chocolate flavour. 
  3. Add eggs, buttermilk, melted butter and vanilla and beat for a couple of minutes until smooth. If you don't want to buy buttermilk just add a splash of lemon juice or white wine vinegar to regular milk and let it stand for a few minutes. 
  4. Stir in the hot coffee slowly until smooth and completely incorporated. Don't worry, it won't make the cake taste of coffee, it just brings out the chocolate flavour and makes it all moist (mmm) and amazing.
  5. Pour batter evenly between the two pans and bake on the middle rack of oven for 30-35 minutes, until a skewer comes out clean. 
  6. Allow to cool for 5 minutes in the pans, then remove and allow to cool on a cooling rack. I like to flip them upside down to cool because they'll have undoubtedly formed a dome shape whilst cooking and this flattens it out a bit (alternatively you can slice off the dome bit and eat it. Yum). 
  7. When completely cool, ice (see below). Sandwich two layers together on a plate - or cake stand if you're posher than me - with a healthy amount, then dollop the rest of the frosting on top of the cake. Smooth it all down the sides, and then level off on top. I also use a damp cloth to wipe the excess stuff from off the plate - I am extremely messy. I don't bother trying to smooth it all out, I like it when it looks messy and swirly. 
  8. Cut a slice and devour like your life depends on it. 


Buttercream Ingredients

400g icing sugar
150g softened butter (not gonna lie, I just use Stork)
75g cocoa
Milk – add a splash at a time until you reach a nice thick, spreadable consistency.

Method 1 - by hand
  1. Sieve the icing sugar and cocoa together into a big bowl (it's an important step, just do it you lazy bunch). 
  2. Stir in the softened butter as much as you can. Don't worry about it when your hand slips and you end up covered in a cloud of icing sugar. Happens to the best of us.
  3. Add milk until it's a nice thick, smooth consistency. Beat for a few minutes.

Method 2 - mixer
  1. Sieve the icing sugar and cocoa together into the mixer. Add the softened butter and whack the mixer on on a low speed until they're incorporated - it should be sandy.
  2. Add the milk bit by bit, mixing in between additions.
  3. When the consistency looks about right, whack it on full and leave it for about 5 minutes. This will get loads of air into the buttercream and it'll be super light and fluffy. You'll also need to use less because it will increase in volume. You can store the leftovers in the fridge (I don't know how long for,  but a long time). 


Mmmm.

Enjoy.

Friday 9 November 2012

New Look - New Job!

I've got a job. Ka-ching! I'm now a Sales Advisor at New Look over the ridiculously busy Christmas period, and fingers crossed if I impress them they'll keep me on afterwards. Xmas temp one day, senior buyer the next. Hey, everyone has to start somewhere, right? Here's my current wishlist of things I want need. Yes, this includes sequin shorts.


Gradient sparkles.

Cracking bit of artifical lighting for you there.

I gave in and got nail extensions. I have stupidly weak nails (my parents say I inherited it from them. Cheers) and any attempts to grow them ended in splitting, breaking and temper tantrums. So I parted with my hard earned cash - hahahahaha - and spent a whopping £21 on these, which a very sweet but slightly rough Chinese lady did for me. She told me I have 'lovely little nails' and then she had to file down the width of the smallest extensions, oops. I told her to leave them clear for me so I can paint them myself. She seemed genuinely gobsmacked by the prospect of me painting my OWN nails.

Anyway, like I said, I painted them myself as soon as I got home. I have no idea what the pink is - some sort of Nails Inc thing I got free with Glamour a while ago (I can't go and look what the name is cause my lazy boyfriend's asleep and it'll only wake him up). It looks very similar to Elizabeth Street, which is available with the current issue that's out. The glittery tips are a Forever21 shade I picked up when I was in Florida in the summer. I did take a look on the website but it seems it's not available in the UK; if you're an American it's called Silver Sparkle. To get the gradient effect, all you need to do is wipe off most of the glitter from the brush, and paint the nail from about halfway up (down? Either way). Repeat, but start a little higher up and with a little more glitter on the brush each time you do it. By doing this you end up with more layers of glitter on the tip, and fewer further down, easy. You'll need a good top coat with so many layers of polish, I will never recommend anything but Seche Vite and you need to buy it now. Like, right now.

Tuesday 6 November 2012

AW13 Nail Polish Trends

Walking into Boots and taking a look at the Essie and Barry M counters is enough to leave anyone confused regarding nail polish. When they produce literally(ish) every colour how are you supposed to know which ones are on trend and which will leave you looking like an 80s reject? Well if you actually care (unlike me, my nails are currently sparkly Barbie pink), here's a nice little guide to what shades are bang on trend in this cold weather. If you need to keep your nails subtle, try adding a little bit of colour with a twist on the French Mani. Aside from these, try classic red - always a winner - or any type of jewel tone.

Nude
Chanel Frenzy; Essie Don't Sweater It; Nails at DKNY.


Oxblood
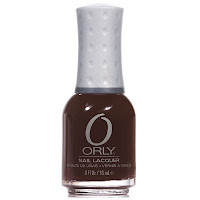
Nails Inc Savile Row; Orly Naughty; Dark tips at Donna Karan.


Camo
China Glaze Elephant Walk; Zoya Evvie; Dark khaki at Christian Dior.


Cobalt
Nicole by OPI If the Blue Fits; Barry M Cobalt Blue; Bright blue at Erdem.


Monday 5 November 2012

High Fashion to High Street: Oversized Coats

Big, oversized cocoon coats were everywhere on the catwalk, and now that trend's been transferred nicely into the high street just in time for this ARCTIC weather we've got (seriously, my entire legs went numb with cold earlier - Topshop Leighs are not good in freezing cold firework displays). They're perfect for layering up and getting nice and cosy, and are a really modern silhouette - something a bit different to what's been in in the past few seasons. Changin' it up, innit. A few examples of the catwalk versions:


As you can see, they're big, exaggerated, long, and that bottom one looks like the sort of thing you'd wear when you reeeeally just want to wear your duvet out and about. The high street versions are altogether more wearable and (more importantly) affordable, so then you have no excuse not to treat yourself to one of Starbucks/Costa's new Christmas specials. And a cake.

The key to styling these coats is the same as with any other item of clothing with masses of volume: you need to keep the rest simple. Slimline trousers, close fitting skirts and no massive chunky boots (sorry Uggs). They're a real statement piece, so let your coat do the talking!

Here are some high street examples of gorgeous oversized coats, so get yourself down to the shops.


Warehouse, £120. For a ladylike nod to the trend, try this neutral coat with a faux (duh) fur collar.


River Island, £100. This ticks all the boxes: heritage, oversized and a gorgeous cosy collar.


River Island, £70. The leopard print makes this one a little bit edgier and lets face it, leopard print is NEVER going out.


New Look, £49.99. If you're a little bit more wary of out-there styles try this classic take on the trend in simple black.


Topshop, £98. Another classic colour - navy - but updated with subtle metallic panels.


Topshop, £110. Finally, trust Topshop to come up with the most dramatic version. If you're brave, this wool blend coat is a serious investment!

Saturday 3 November 2012

Wanderlust.

I have a serious case of wanderlust at the minute. Things in England are currently wet, windy, and utterly miserable, and I'm bored. I've been dreaming about booking a flight and jetting off somewhere beautiful, hot and sunny, and leaving all my cares and worries behind for a few days.
Somehow I don't think my overdraft would appreciate it.
I do, however, have an interview at New Look tomorrow for a nice little PT job while I'm at uni, so please cross your fingers for me. My dreams might be a tiny little bit closer then!

A week on the sunny island of Santorini, lazing by the pool and licking tzatziki off my fingers?


A few days in Croatia, swimming in the sea and snarfing seafood, bread and salads?


Or even a long week in the Bahamas, lying in the sand and eating jerk chicken and mahi-mahi.


So, anyone up for it?


N.B. All images obtained from The Londoner because I am sickeningly jealous of her life and blame her wholeheartedly for my current need to go away.


Friday 2 November 2012

Current favourite app: Pattrn

Android users, get your phone/tablet/other crazy gadget loaded with Android OS out, and follow my instructions.

1) Open Google Play store.
2) Search for Pattrn.
3) Download it.

Not gonna lie, it's simple. It's an app loaded with gorgeous patterns (no, really?) which you can set as your wallpaper or share it via Facebook or whatever. I just use it to make my tablet look pretty. Here's a screenshot showing some of my current favourites - just click on it to make it bigger:


Now go and play.